
As you grow your shoe washing business, consistency becomes your most valuable asset. What was once easy to manage when you handled every pair yourself becomes complex with a team. A single subpar cleaning can damage your reputation and undo months of hard work. The solution is not to micromanage, but to build a robust Quality Assurance (QA) system.
This guide provides a blueprint for establishing and maintaining high service standards. We will break down how to define quality, create checklists, manage defects, and train your team. Implementing these steps will ensure every pair of shoes that leaves your shop meets the same exceptional standard, building customer trust and fueling sustainable growth.
What Does Quality Mean in Shoe Care?
Quality in shoe care is not subjective; it is a set of measurable outcomes. To build a reliable QA program, you must first define what a "perfectly cleaned shoe" looks like for your business. These standards become the foundation for your checklists and training.
- Material Integrity: The shoe's original materials (leather, suede, canvas, mesh) are undamaged, with no signs of abrasion, stiffness, or warping.
- Colorfastness: Colors are vibrant and have not bled or faded. Whites are bright, and blacks are deep.
- Stain and Odor Removal: All visible stains are gone, and the shoe has a neutral or fresh scent. There is no residual dampness or chemical odor.
- Sole and Midsole Purity: Midsoles are evenly clean and free of scuffs. Outsoles are clear of dirt, debris, and grime in the grooves.
- Shape Retention: The shoe maintains its original structure. It is not crushed or misshapen from the cleaning or drying process. Laces are clean and properly threaded or packaged.
- Final Presentation: The finished pair is professionally presented, whether in a box, a dust bag, or neatly tied, ready for the customer.
Standardize Your Process, Standardize Your Quality
You cannot inspect quality into a product; it must be built into the process. Standard Operating Procedures (SOPs) are the first line of defense in your QA system. They ensure every technician, regardless of experience, follows the same approved steps.
Your SOPs should cover every stage of the workflow:
- Pre-Inspection & Prep: Documenting pre-existing damage with photos, removing laces, and inserting shoe trees.
- Cleaning by Material: Creating separate, detailed SOPs for different shoe types (e.g., "SOP: Suede & Nubuck Cleaning," "SOP: White Leather Sneakers").
- Drying Protocol: Specifying air-drying methods, fan usage, and temperature controls to prevent material damage.
- Conditioning & Finishing: Outlining how to apply leather conditioners or protective sprays.
- Sanitization: Detailing the use of ozone or UV-C equipment, including cycle times and safety measures.
- Lacing & Packing: Defining the final presentation, from how laces are tied to how the shoes are placed in the delivery box.
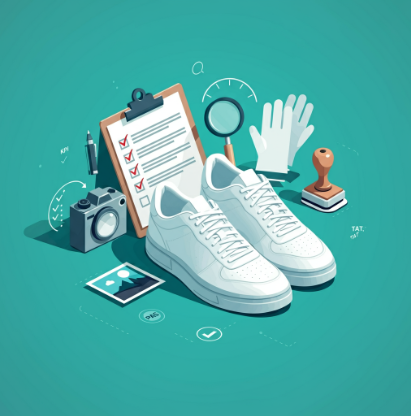
Building Your QA System: Checkpoints and Sign-Offs
With standardized processes in place, you can now build a system to verify the results. This system should have two key components: in-process checks and a final QA inspection.
In-Process Checks
These are quick verifications that happen during the workflow. For example, a technician could be required to get a supervisor's sign-off before moving a delicate pair of suede shoes from the cleaning station to the drying rack. This prevents small errors from becoming big problems.
The Final QA Checklist
This is the heart of your verification process. Before any pair of shoes is packed, it must pass a final inspection against a detailed checklist. This checklist should be a physical or digital form that a designated QA person (or the technician themselves, initially) completes.
Sample Final QA Checklist:
- [ ] Overall Appearance: Shoes are a matched pair, clean and well-presented.
- [ ] Uppers: Free of stains, discoloration, and material damage.
- [ ] Midsoles: Evenly white/clean, no scuff marks left.
- [ ] Outsoles: Debris removed from grooves.
- [ ] Interior: Dry, odor-free, and sanitized.
- [ ] Laces: Clean, dry, and correctly laced or bagged as per order.
- [ ] Shape: Shoe structure is maintained, with shoe trees if applicable.
- [ ] Before/After Photo: Final "after" photo taken and logged.
- Technician Sign-Off: [Technician Name]
- QA Sign-Off: [QA Inspector Name]
- Date: [Date]
Creating a Defect Taxonomy
When a shoe fails the QA check, the issue needs to be categorized. A defect taxonomy helps you track recurring problems and identify areas for process improvement or additional training.
Common Defect Categories:
- Minor Cosmetic: A small, easily correctable issue (e.g., a missed spot on a midsole).
- Major Cosmetic: A significant visual flaw (e.g., uneven whitening on a canvas shoe).
- Material Damage: Damage to the shoe's fabric or structure (e.g., stiffened suede from improper cleaning).
- Functional Failure: The shoe is not fit for return (e.g., still has a strong odor, is damp).
Examples:
- Uneven Whitening: A midsole shows brighter white patches and duller areas.
- Suede Nap Damage: Suede feels stiff or flat instead of soft and velvety.
- Glue Staining: Yellowing appears along seams where factory glue has reacted with a cleaning agent.
- Odor Residual: The shoe still smells unpleasant after sanitization.
Your Rework Policy: Setting Clear Expectations
Not every shoe will pass QA on the first try. A rework policy defines what happens next.
- Rework SLA (Service Level Agreement): Define a clear turnaround time for corrections. A minor rework should be completed within hours, not days.
- Rework Process: The defect is logged, and the shoe is sent back to the appropriate station with clear instructions for correction.
- Customer Claims: If a customer brings back a shoe, your policy should dictate the response. A good starting point is to offer a complimentary re-cleaning. Log all customer complaints to identify trends.
An acceptable internal rework rate might be 5-7% when you first implement the system, with a goal to reduce it to under 2% as processes and training improve.
Training and Calibrating Your Team
Your QA system is only as good as the people using it.
- Swatch Boards: Create physical boards with samples of different materials (suede, leather, mesh) showing "before," "after," and "damaged" states. This is a powerful visual training tool.
- Test Pairs: Use old, donated shoes as practice pairs for new technicians.
- Monthly Calibration Meetings: Once a month, get your team together to review recent reworks and customer feedback. Discuss what went wrong and how to prevent it. This aligns everyone on what "quality" looks like. For complex issues, seeking guidance from a commercial laundry consulting expert can provide valuable insights.
Tools and Technology for QA
You don't need complex software to run an effective QA program.
- Checklists & SOPs: Laminated checklists and printed SOPs at each workstation are a great start.
- Photo Logs: Using a smartphone to take "before" and "after" photos is crucial. It protects you from claims of pre-existing damage and serves as a record of your work. Store these in shared digital folders organized by order number.
- QA Apps: As you scale, simple apps like iAuditor or even a well-organized Trello board can help digitize your checklists and track rework.
KPIs to Measure Quality Performance
What gets measured gets managed. Track these key performance indicators (KPIs) to monitor the health of your QA system.
- First Pass Yield (FPY): The percentage of shoes that pass QA on the first try. A high FPY (aim for 95%+) means your processes are effective.
- Rework Rate: The percentage of shoes that require rework. This is your primary metric for identifying process problems.
- Turnaround Time (TAT) Compliance: The percentage of orders completed within your promised timeframe. Reworks can negatively impact this.
- Customer Satisfaction (CSAT): Measure this with post-service surveys. A simple "How satisfied were you with your cleaning?" can provide immense insight.
Your 30-Day Quality Rollout Plan
- Week 1: Define and Document. Write down your official quality standards for a perfectly cleaned shoe. Draft the SOP for your most common service (e.g., standard sneaker cleaning).
- Week 2: Build the Tools. Create your final QA checklist. Set up a simple "before" and "after" photo station with good lighting.
- Week 3: Train and Test. Train your team (or yourself) on the new SOP and checklist. Use test pairs to practice the full process, including the QA inspection.
- Week 4: Go Live and Measure. Implement the QA checklist for all orders. Start a simple log to track your First Pass Yield and any reworks.
Conclusion
Implementing a quality assurance system is a defining step in the journey from a hobbyist to a professional shoe washing business. It builds accountability, drives consistency, and protects your brand's reputation. By standardizing your processes, verifying your work, and continuously training your team, you create a culture of excellence. This commitment to quality is what will ultimately set you apart from the competition and turn one-time customers into lifelong advocates.